|
|
|
||||
|
|
|
||||
| Page date Mon Sep 9 13:46:36 2013 . | Improve this page |
Although the minimum development environment for µOS++ SE requires only a shell terminal and a character based editor (like vi or emacs), the recommended development environment is based on Eclipse IDE, more specifically on Eclipse IDE for C/C++ Developers, available from Eclipse downloads.
Currently there are no specific plug-ins required, so any recent Eclipse version should work. The below steps are based on Eclipse 4.3 Kepler, running on OS X, but should not be much different when running on Ubuntu.

The below procedure is based on my personal preferences, and I usually like to keep things grouped in separate folders. If you have your strong opinions on how things should be organised, you can obviously adjust the procedure to suit your need. Otherwise, if you do this for the first time, it is recommended to follow the procedure in detail, as-is, to avoid surprises.
Although you can use an existing Eclipse that you already have installed, it is recommended to keep things distinct, and do not share development tools between project, especially since Eclipse does not install system components and has absolutely no problems with multiple instances of itself.
So, it is recommended to prepare a local folder where all current and future Eclipses used for this project will be stored, and to download a fresh Eclipse into it:
mkdir -p "~/work/uOS/Eclipses"
mkdir -p "~/work/uOS/Eclipse Workspaces"
~/work/uOS/Eclipse Workspaces/workspace-4.3-osx
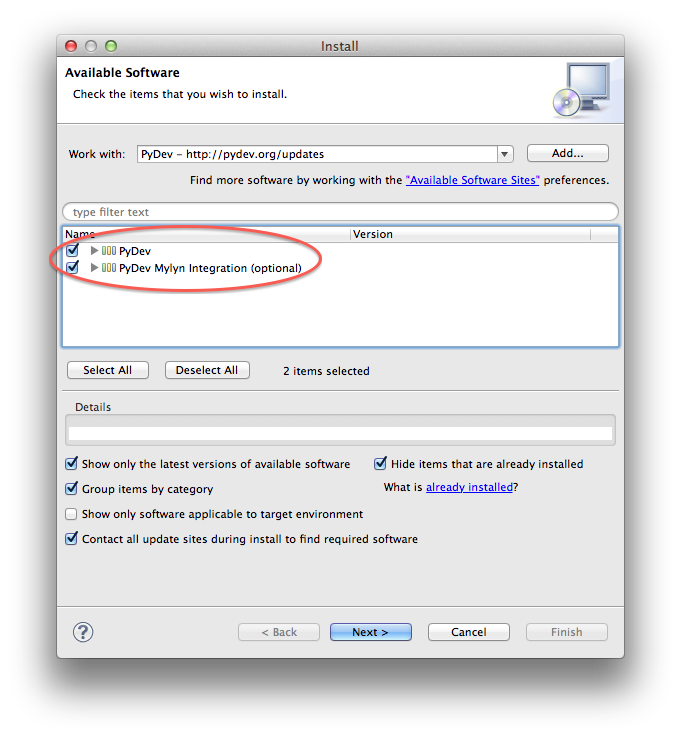
The PyDev plug-in is necessary to better view the Python XCDL files, even if Python development is not planned.
In Help menu → Install New Software…
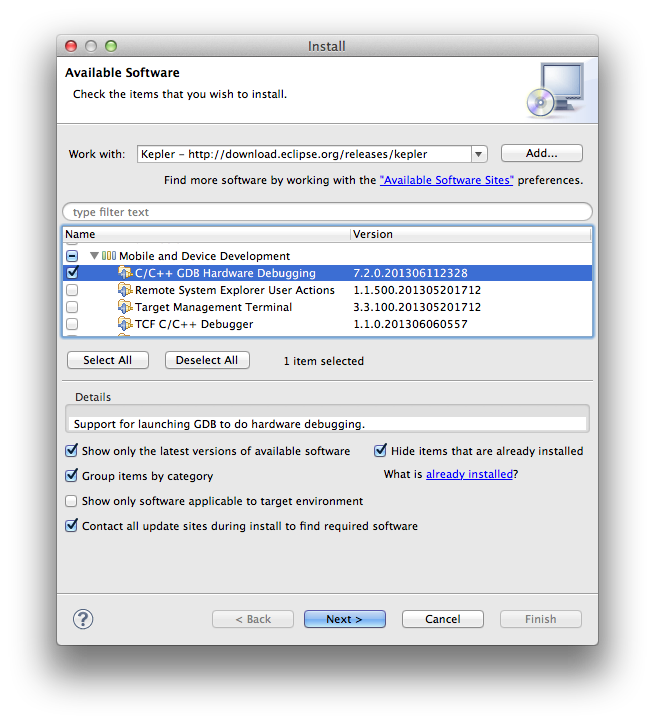
If you plan to do any debugging using JTAG/SWD probes, it is recommended to install the GDB Hardware Debugging support plug-in.
In Help menu → Install New Software…
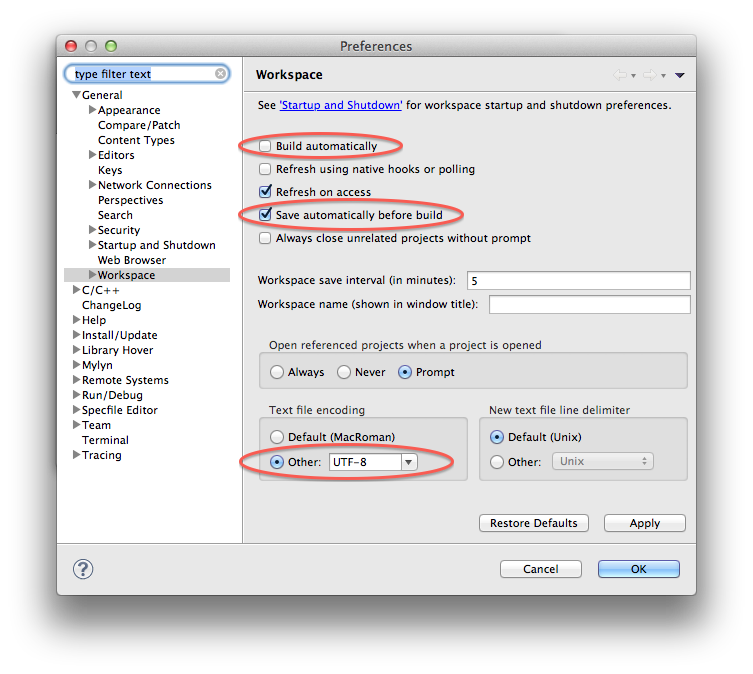
In Eclipse menu → Preferences… → General → Workspace
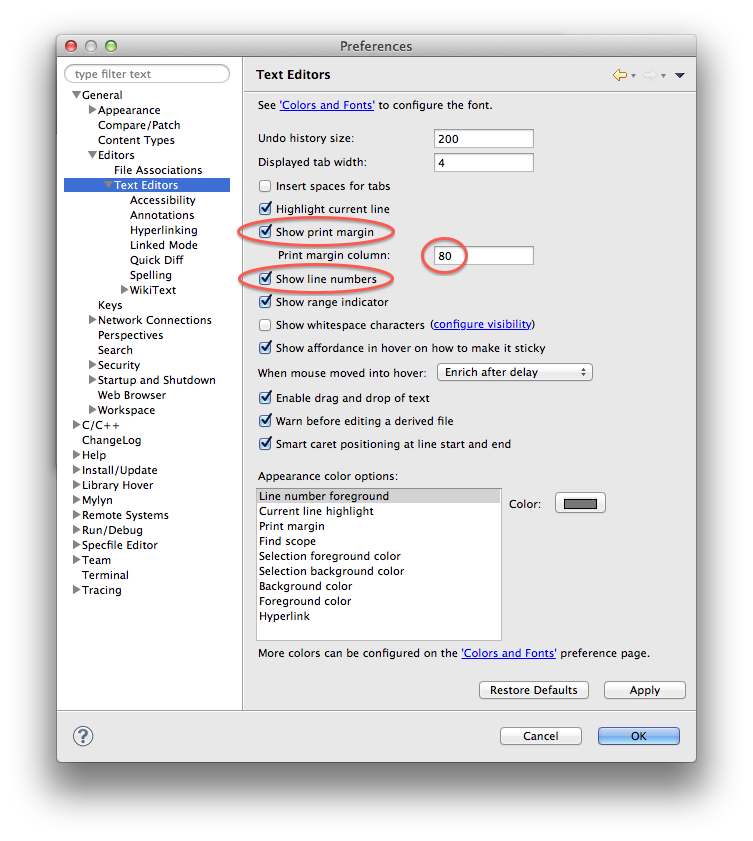
In Eclipse menu → Preferences… → General → Editors → Text Editors
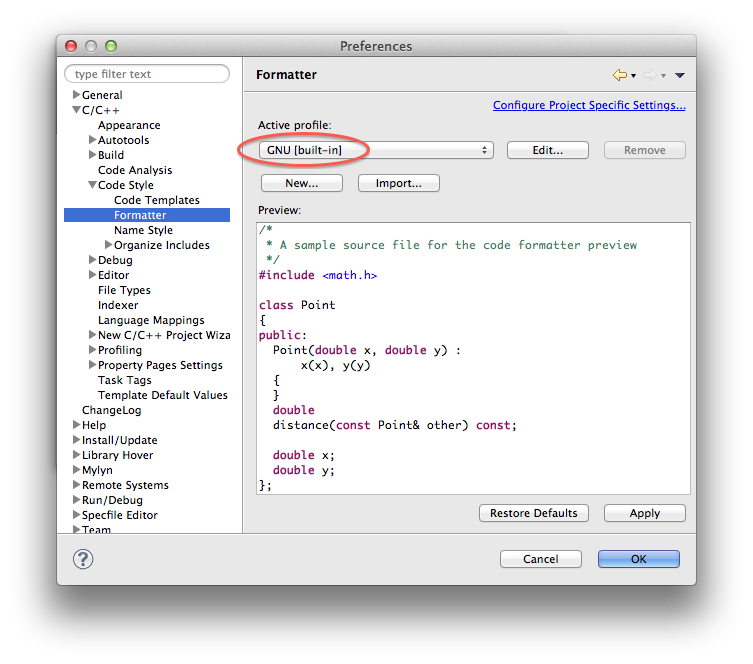
In Eclipse menu → Preferences… → C/C++ → Code Style → Formatter
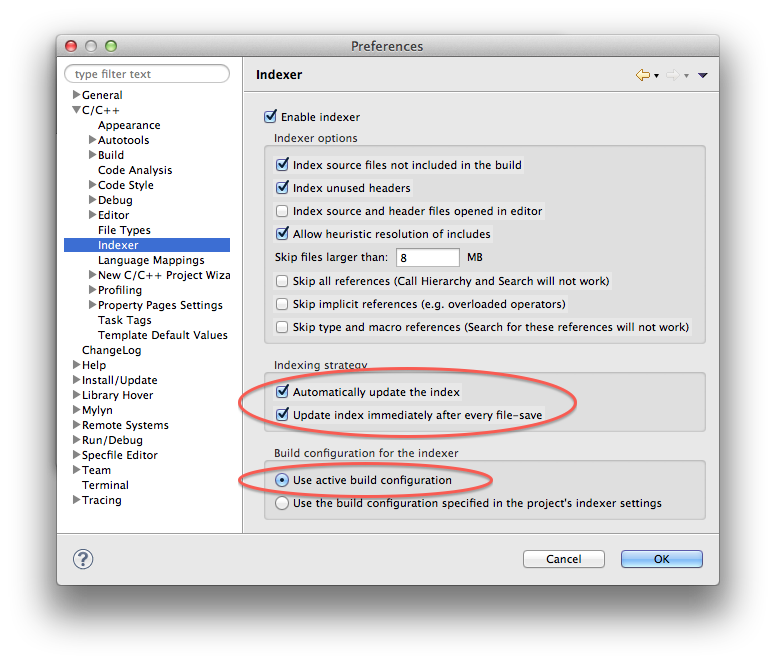
In Eclipse menu → Preferences… → C/C++ → Indexer
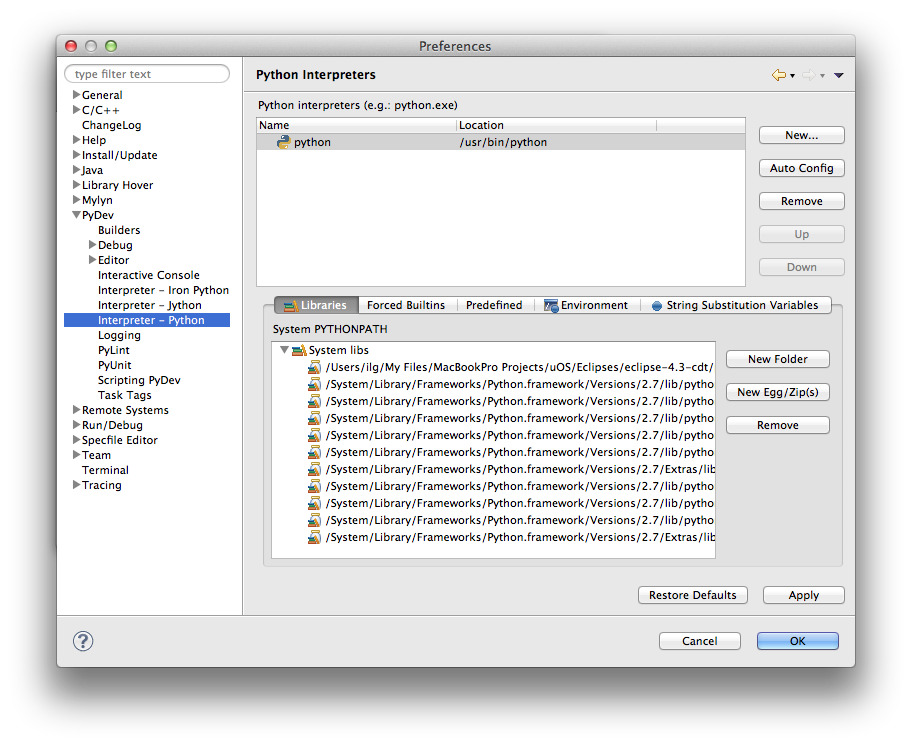
In Eclipse menu → Preferences… → PyDev → Interpreter - Python
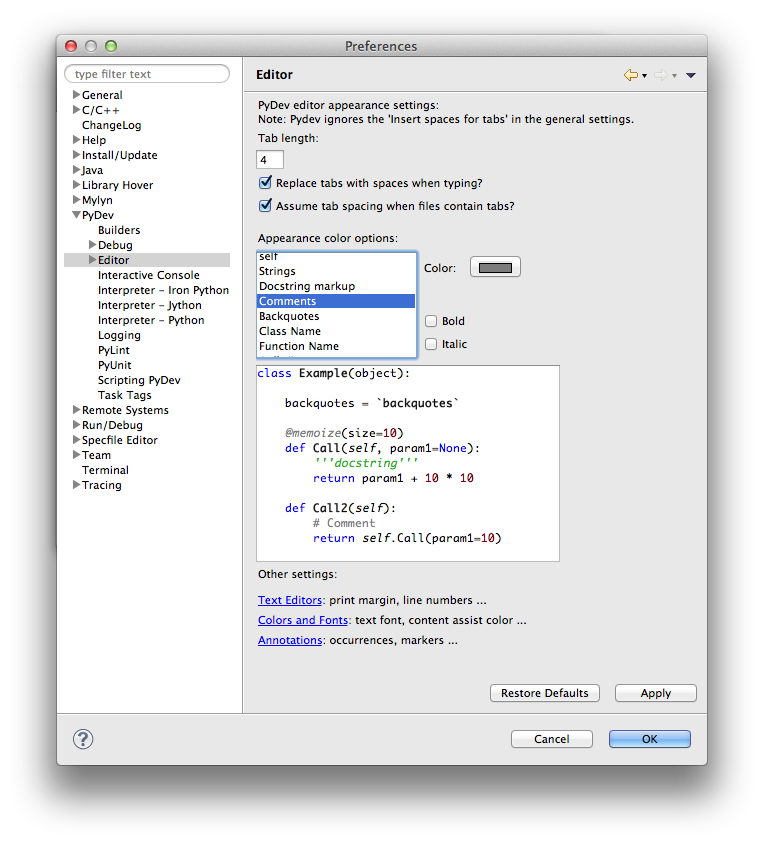
In Eclipse menu → Preferences… → PyDev → Editor
If you already performed the unit tests, the two required repositories are already locally cloned, and you just have to inform Eclipse on their location, and import the projects.
For this, in the File menu → Import
Repeat this procedure for the xcdl-python.git repository, and import the xcdl-python project.
If you did not perform the unit tests, then you need to clone the repositories to a local folder. You can do this either using the command line git command and then just perform the above steps, or using Eclipse specific commands, as explained below.
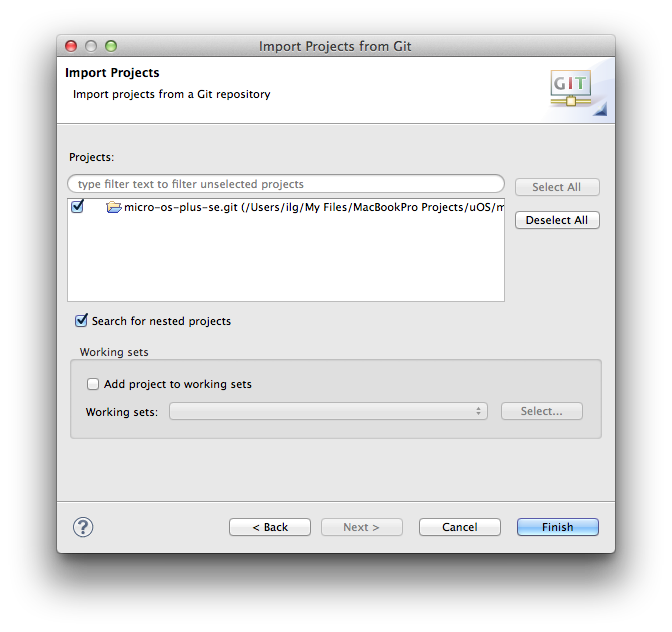
In the File menu → Import
https://github.com/micro-os-plus/micro-os-plus-ii
/Users/XXX/work/uOS/micro-os-plus-se.git
Similarly, repeat the steps for the second repository URI https://github.com/xcdl/xcdl-py, clone it to an absolute folder path like /Users/XXX/work/uOS/xcdl-python.git and import the xcdl-python project.
To simplify entering of various program or folder locations in Eclipse, it is recommended to define them once, as variables, and refer them as many times as needed.
Eclipse is a bit confusing when dealing with variables, since it allows several types of them, called with different names, but, with some attention, it allows the job done.
In the Eclipse menu → Preferences… → C/C++ → Build → Build Variables
MICRO_OS_PLUS_SE_LOC
XCDLBUILD
scripts/xcdlBuild.sh
GCC_ARM_EP_LOC

In addition to the C/C++ Build Variables, we also need the µOS++ SE location for a linked folder, so an additional definition General Workspace group is required.
In the Eclipse menu → Preferences… → General → Workspace → Linked Resources
MICRO_OS_PLUS_SE_LOC
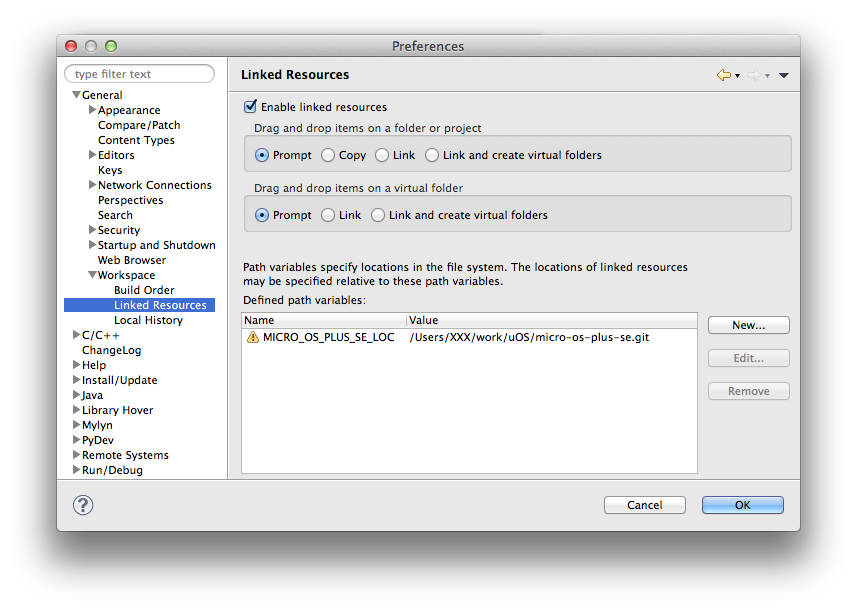
Note: The yellow exclamation mark is there because the sample path is not valid.
Once the µOS++ SE folder is available, it can be linked to as many projects as necessary, without having to keep multiple copies of it, significantly simplifying space management.
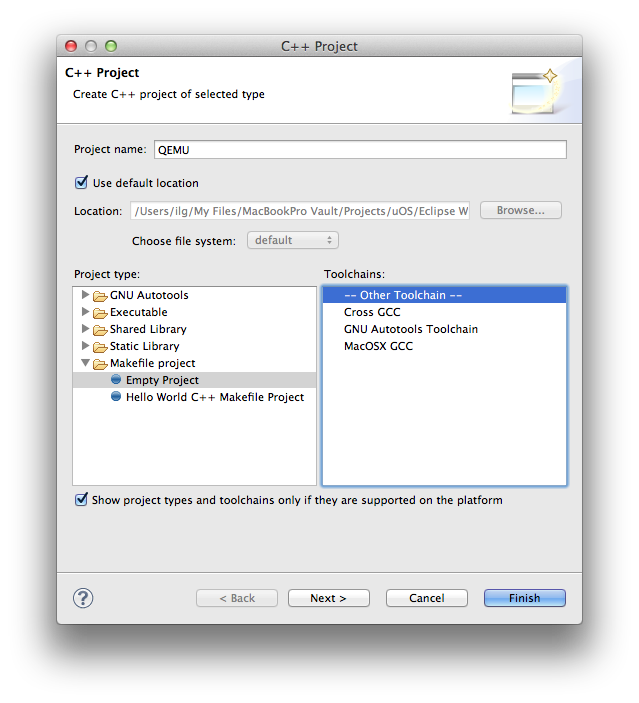
The Eclipse projects used for µOS++ applications should be created as Makefile projects, without a toolchain (this detail is very important!).
In order for the indexer to function properly, some additional details need to be manually defined:
µOS++ has a large number of build configurations defined in the XCDL metadata, to support not only multiple applications, but also building the same application for multiple platforms (different boards, different synthetic platforms), with different compilers, in different bit sizes (32/64-bit), for Debug/Release. There are no metadata limitations on how these build configurations should be grouped, so it is completely up to you, you can group them by applications, by platform, or by any other criterion.
For example, to create a project to group all QEMU build configurations, follow the steps:
In the File menu: New → C++ Project
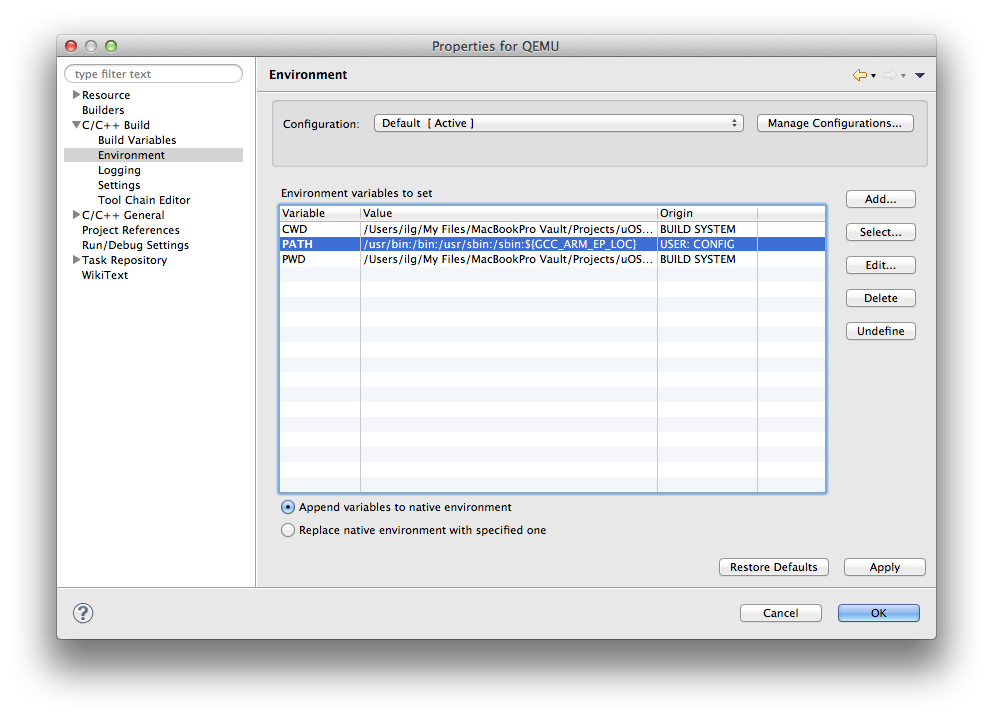
The new project is now visible in the Project Explorer, but is completely empty, and, to be functional, it needs to be configured.
PATH
${GCC_ARM_EP_LOC}
${COMMAND} with the actual g++ command name, for example arm-none-eabi-g++
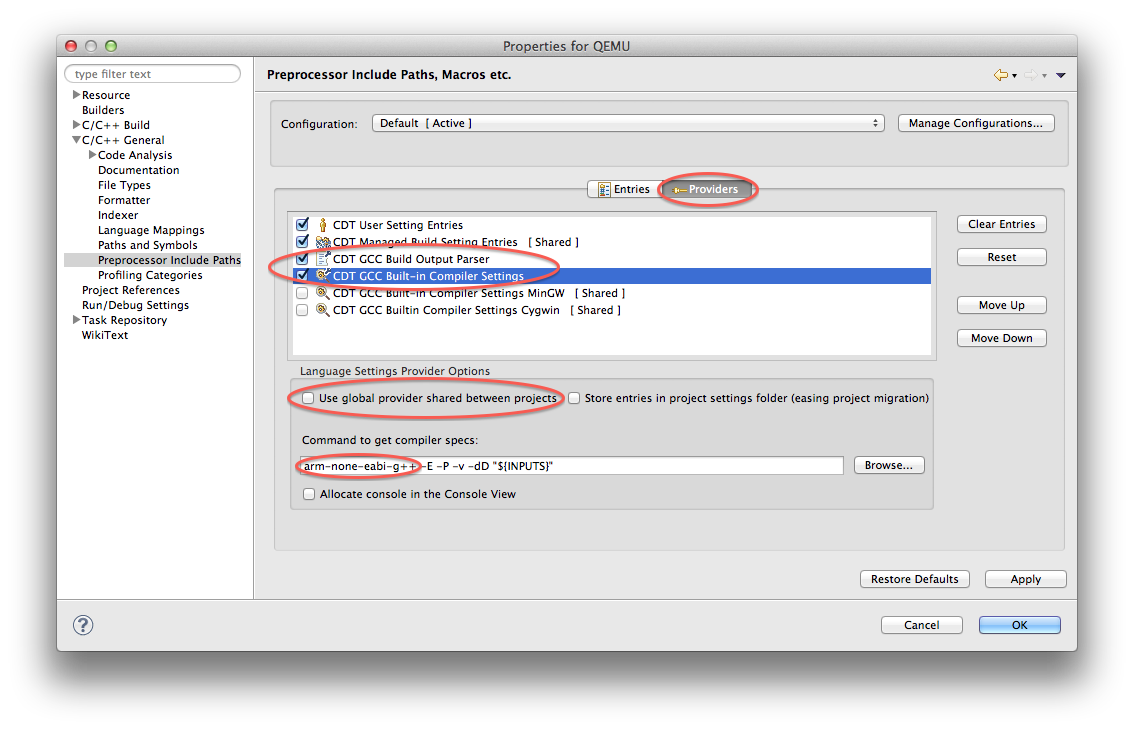
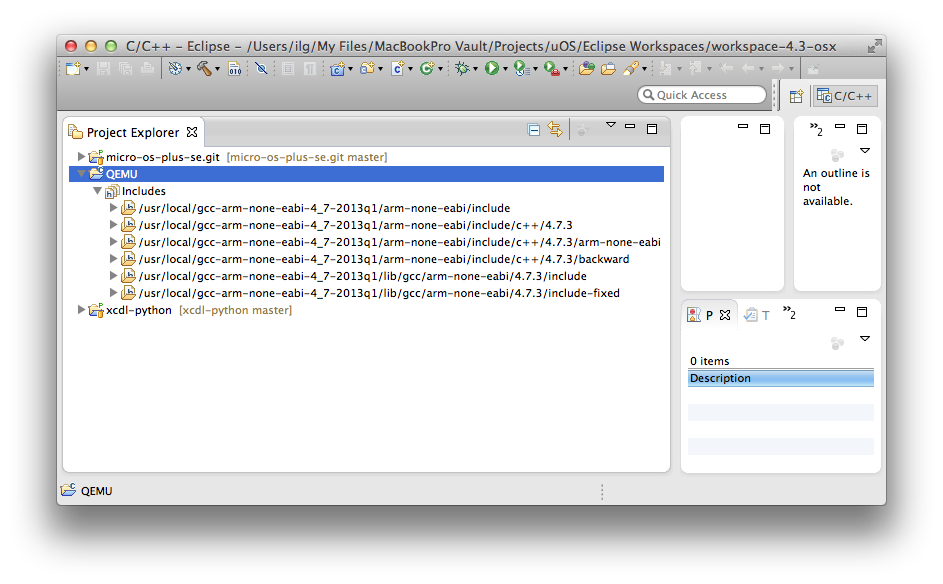
Once the toolchain path and the discovery command are properly configured, the Includes list in the Project Explorer should be populated with the a list specific to the toolchain.
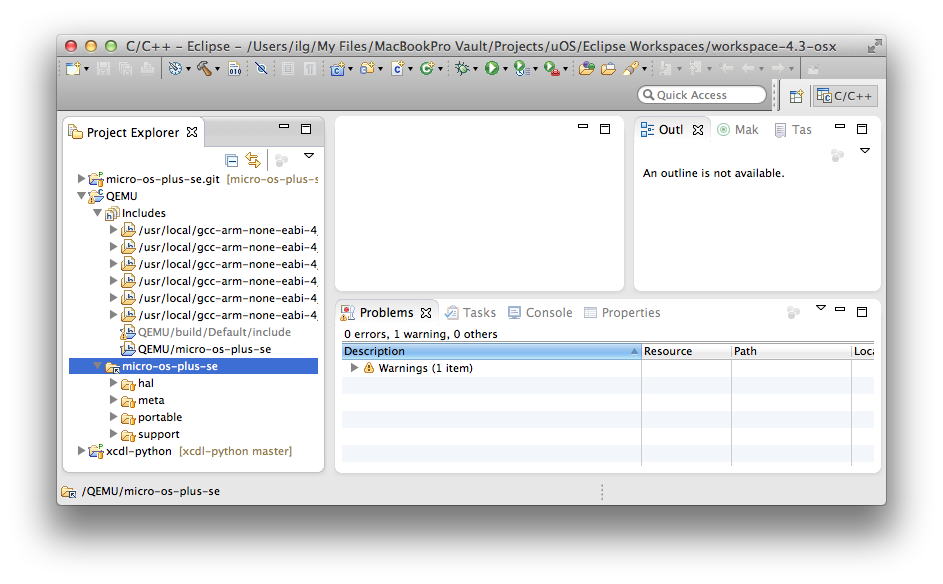
${ProjDirPath}/build/${config_name:${ProjName}}/include
${MICRO_OS_PLUS_SE_LOC}/packages
MICRO_OS_PLUS_SE_LOC/packages (alternatively this can be done by pushing the Variables… button, selecting the MICRO_OS_PLUS_SE_LOC variable, pushing the Extend… button and selecting the packages folder)To check if the definition is valid, expand the micro-os-plus-se folder and check if the µOS++ SE sources are available.
/bin/bash "\${XCDLBUILD}" --repository='\${MICRO_OS_PLUS_SE_LOC}/packages' --build_config=\${config_name:\${ProjName}}
All above settings were performed on the Default build configuration. This configuration in itself is not functional, since there is no µOS++ configuration called Default, but is useful, since it can be used as template to create actual build configurations.
This can be done using the Manage Configurations dialog.
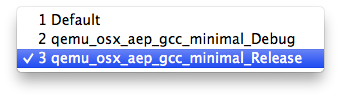
qemu_osx_aep_gcc_minimal_Debug
Eventually repeat this step, and add a new build configuration named qemu_osx_aep_gcc_minimal_Release.
To build only one configuration, click on the down pointing triangle on the right of the hammer icon and select one of the existing configuration. This selects the active configuration and also starts the build process.
Avoid to build all defined configurations (using the Project menu: Build All) since this will also try to build the python projects, and it takes some time.
The result of each build is a folder below the build folder, with the same name as the build configuration.
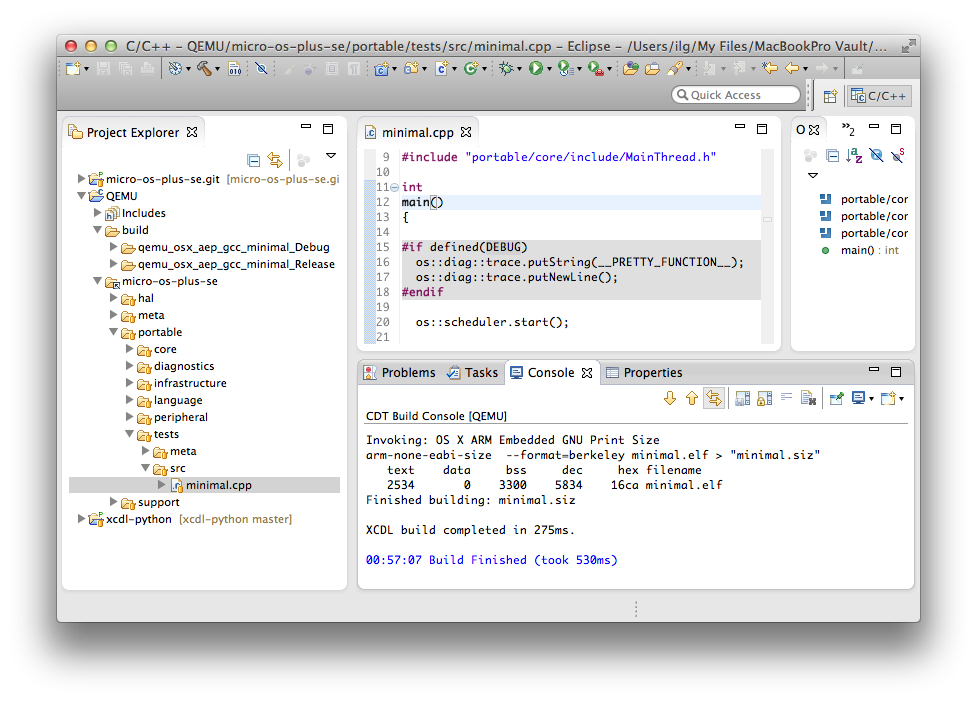
The indexer is configured to automatically reindex the active build configuration.
To check if this functions properly, switch between Release/Debug and verify if the two lines turn grey on Release and remain white on Debug.
If, for any reason, during development, you think the index was not updated, you can force it to run using the Project menu → C/C++ Index → Rebuild.
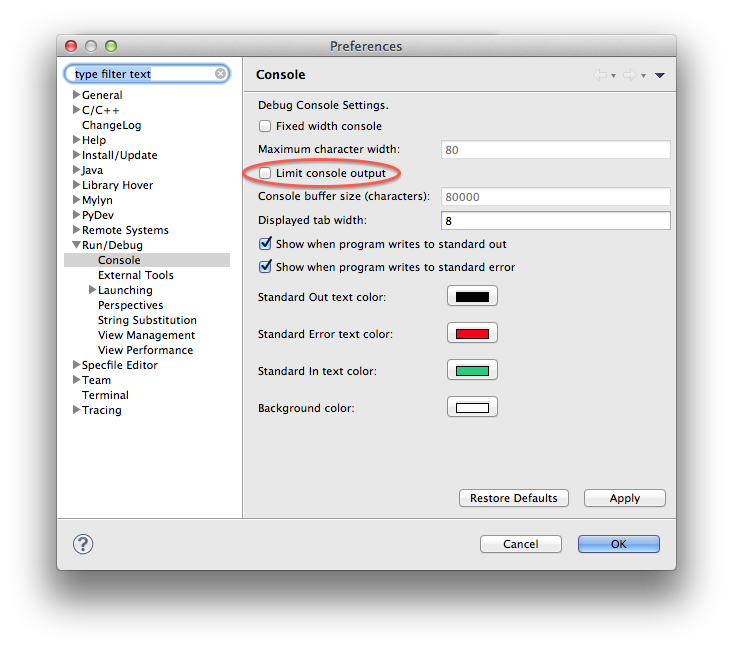
With such a complex project, the build output is sometimes quite large, and it is recommended to remove any limitations imposed on the console output, in order to avoid missing its beginning.
The Eclipse menu: Preferences… → Run/Debug → Console
As a detail that sometimes is annoying, it is recommended to configure Clean to clean only the selected project, and to not start build automatically.
This is achieved via the Project menu → Clean…

